Lasher
- tankhealdispelTanks beware of the Spore Spines DoT these mobs apply with their melees, using defensives, freedom effects, or magic dispels as needed


31min Mythic+ Timer
Every damage number in the spell descriptions below already includes this increase – the same percentage the game shows when you slot the key at the Font of Power.
This is the number from the Font of Power. Tyrannical and Fortified are not included: from +10 both are always active — bosses then hit another 15 % harder, trash 20 %.
What is worth bringing to this dungeon, sorted by how much it matters. Anything marked “not needed” you can leave at home.
If you are using the Mythic Dungeon Tools (MDT) Addon, you can import our PUG Friendly Route for the Mythic+ difficulty of The Blinding Vale below.
The Blinding Vale M+ Dungeon Route: https://wago.io/HLI3Wq7sA
To start the dungeon you’ll be given the choice of heading right towards Ikuzz the Light Hunter, or left towards the Lightblossom Trinity. Outside of deciding which boss you face first, this choice also affects which buff you encounter.
Left - The Light-Starved Blossom can be interacted with by Paladins, Priests, and Herbalists with at least 25 Midnight skill points to grant your group Flourishing Stride, increasing speed by 20% and haste by 5% for 2mins.
Right - The Baby Grovecrawler can be freed by Hunters and Druids, causing it to aid you in combat for 1min.
Generally the Light-Starved Blossom buff has a more value, which combined with some more favourable trash packs causes me to recommend most groups go left.
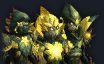 BossLightblossom Trinity
kickKeep an interrupt rotation on Kezkitt’s random target Light Bolt ability.
healdispelmoveIf targeted by Thornblade, move to avoid cleaving allies then run out of the effect when Lekshi jumps to you. If needed use a defensive or bleed cleanse to remove the DoT this applies.
tankhealmoveTanks be ready with a defensive for Bedrock Slam, then position the bosses near one of the 3 Fertile Loam circles this spawns, just be ready to avoid the Lightsower Dash line attack that passes through all 3 circles.
tankdpssoakWhen Lightblossom Beam is cast the circles become soaks which deal ticking damage to players inside. These must be soaked to prevent the Lightbloom Overgrowth AoE damage, so I recommend the tank and 2 other players step into them ASAP. After the end of the channel the circles turn into Light-Scorched Earth as area denial, so tanks need to be ready to quickly reposition the bosses away before the next Bedrock Slam.
 BossIkuzz the Light Hunter
tankdpshealmoveHealers be ready for the pulsing raid damage from Thorncaller Roar, while all players should make sure to avoid the Bloodthorn Roots on the ground. This is especially dangerous when the boss has entered a Lightcrazed Frenzy, which happens at 50% health.
dpsIf roots are stepped on you can cleave them down or use a freedom effect to remove them from the player. You can also use freedom effects to clear multiple roots if needed.
moveWatch your position during Verdant Stomp so you don’t get pushed into a root, and either use a freedom effect or group up near the boss so that the root that spawns on all players after a short delay can be easily cleaved.
tankdpskitemoveBloodthirsty Gaze causes the boss to fixate a random player, run from the boss and if possible kite him over existing roots to cause them to be destroyed.
After defeating both initial bosses you’ll be able to interact with a nearby bird to fly down towards Lightwarden Ruia’s area. While there are many familiar mobs here, many of them are now infected with Lightwarden's Blight, causing them to do an AoE hit on death and leave behind a puddle, so keep that in mind when pulling in this part of the dungeon.
Outside of the familiar mobs, there’s also a new Lieutenant in this area, Luminous Thornmaw.
tankdpshealkickmoveOn pull until 70% health the boss is Moonkin Form. Keep interrupts on Warden's Wrath to mitigate tank damage and avoid the circles created by Lightfall. Lightfire debuffs 3 players, use defensives as needed and be ready to avoid the tornadoes that shoot out on expiration. If possible I recommend having the debuffed players stack up to make it easier to dodge.
tankdpshealdispelmoveFrom 70% to 40% health the boss enters bear form, gaining the Mangling Claws passive which tanks should be aware of. Use self-healing, bleed cleanses, or other defensives to help remove the Bleed applied by Grievous Thrash. If targeted by Pulverizing Strikes make sure to spread out to avoid cleaving allies with the frontal.
tankdpshealFrom 40% health until defeated the boss goes into his Haranir form, channeling Spirits of the Vale to rotate through Lightfire, Grievous Thrash, Lightfall, and Pulverizing Strikes every 8s for the rest of the encounter.
After defeating Lightwarden Ruia and making your way towards the final boss your group will be ambushed by a new mini boss, though once again there are several other mobs we’ve already seen before in this area as well.
 BossZiekket
healHealers beware of the Oozing Xylem passive, causing pulsing group damage for the duration of the encounter.
dpskickCleave down the adds created by Awaken the Lightbloom, using interrupts and CCs to reduce the number of Lightspore Shot casts. Once defeated, hit their bodies with the Concentrated Lightbeam frontal to permanently destroy them. Note that this creates a large puddle on the ground, so I recommend positioning the boss and adds towards the edge of the platform.
dpshealsoakmoveSoak the orbs created by Lightbloom's Essence before they reach the boss, evenly spreading them out so the DoT doesn’t get out of control.
tankhealdispelTanks be ready for the Thornspike hit and knockback, using a defensive or bleed cleanse as needed.
Nothing here matches that filter.